FROM jenkins/jenkins:lts-slim-jdk17 (1)
# Pipelines with Blue Ocean UI and Kubernetes
RUN jenkins-plugin-cli --plugins blueocean kubernetes (2)Scaling Jenkins on Kubernetes
Jenkins Scalability
When using the standalone Jenkins server you don’t have to worry about multiple servers and nodes. However, the issue with this setup is that your server can become overloaded with numerous jobs running at the same time. There are ways to solve this problem by increasing the number of executors, but you soon end up hitting a performance limit.
To overcome this problem, you can offload some of the jobs to different machines called Jenkins agents.
Scalability is a measure that shows the ability of a system to expand its capabilities to handle additional load. One of the strongest sides of Jenkins is that it has a scaling feature out-of-the-box. Jenkins scaling is based on the controller/agents model, where you have a number of agents and one main Jenkins controller that is responsible mainly for distributing jobs across the agents. Jenkins agents run a small program that communicates with the Jenkins controller to check if there’s any job it can run. When Jenkins finds a job scheduled, it transfers the build to the agent.
Scaling Jenkins on Kubernetes
Taking it a step further, running a container orchestrator such as Kubernetes, you can make Jenkins do smarter things. The Jenkins controller is responsible for the hosting configuration and the distribution of jobs to multiple agents. However, you don’t need the agents to be preexisting, they can be created on the fly, as in when they’re required.
Advantages of scaling Jenkins on Kubernetes
- Autohealing is possible
-
If your build or your agent gets corrupted, you no longer need to worry — Jenkins will remove the unhealthy instance and spin up a new one.
- Run builds in parallel
-
You no longer have to plan the executors and limit them; instead, Jenkins will spin up an agent instance and run your build in it.
- Even load distribution
-
Kubernetes manages loads well, and it’ll make sure your Jenkins agents spin up in the best available server, which makes your builds faster and more efficient.
Setting Up Scalable Jenkins on Kubernetes
Jenkins Controller Installation
To install a Jenkins controller, create your docker image based on the base Jenkins image, which can be found in the official docker repository (keep in mind that Docker should be installed on your local machine, see the installation steps here). For this, you need to create a dockerfile. Having your Jenkins setup as a dockerfile is highly recommended to make your continuous integration infrastructure replicable and have it ready for setup from scratch. So let’s create our first example dockerfile for the Jenkins controller:
| 1 | FROM [image_name]:[tag] - this line means that our dockerfile will be based on an existing image. It is obvious that for our dockerfile, we take the Jenkins base image, which you can find in the official Docker repository. |
| 2 | RUN [command] - this line means that we are going to run this command inside the image during the build process.
In our case we use the RUN command to install different common Jenkins plugins, which can be required for your Jenkins controller. |
You can install additional plugins just by adding similar commands inside your dockerfile like we did above. However, one of the plugins above is critical for installation. It is the Kubernetes plugin. This plugin is designed to implement Jenkins scaling on top of a Kubernetes cluster.
Next, we need to build the image that can be used and run inside the Kubernetes cluster later on.
| Before building the image, if you use Minikube, then you need to keep in mind that Minikube runs on your local machine but inside a virtual machine. That’s why Minikube doesn’t see the docker images you created on your local machine. You can build your docker image right inside your Minikube virtual machine, but for this you need to execute this command: |
eval $(minikube docker-env)This command doesn’t show any output after execution so if you didn’t get any errors then everything should be fine. To build a docker image based on the dockerfile you created, all you need is to run this command from the same folder where you have created the dockerfile:
docker build -t my-jenkins-image:1.1 .After the build process is finished, let’s verify that the newly created image is there:
docker images
REPOSITORY                    TAG                 IMAGE ID            CREATED             SIZE
my-jenkins-image              1.1                 d6e46aa2470d        10 minutes ago      969MB
Congratulations! Your Jenkins controller image is created and can be used inside your Kubernetes cluster.
Deploy Jenkins Controller
After successfully creating your Jenkins image, follow the steps explained in the Jenkins installation doc to deploy your Jenkins controller.
|
Ensure to replace the image in the |
To validate that creating the deployment was successful you can invoke:
kubectl get deployments -n jenkinsTo validate that creating the service was successful you can run:
kubectl get services -n jenkins
NAME       TYPE        CLUSTER-IP       EXTERNAL-IP    PORT(S)           AGE
jenkins    NodePort    10.103.31.217    <none>         8080:32664/TCP    59s
Access Jenkins dashboard
So now we have created a deployment and service, how do we access our Jenkins controller?
From the output above we can see that the service has been exposed on port 32664.
In addition to that, we need to know the IP of the Kubernetes cluster itself.
We can get it by using this command:
minikube ip
192.168.99.100
Now we can access the Jenkins controller at http://192.168.99.100:32664/
Jenkins Agents Configuration
Now it’s time to configure Jenkins agents. As you might remember, we installed the Kubernetes plugin using the controller dockerfile so we don’t need to install anything separately and the required plugin should be already there.
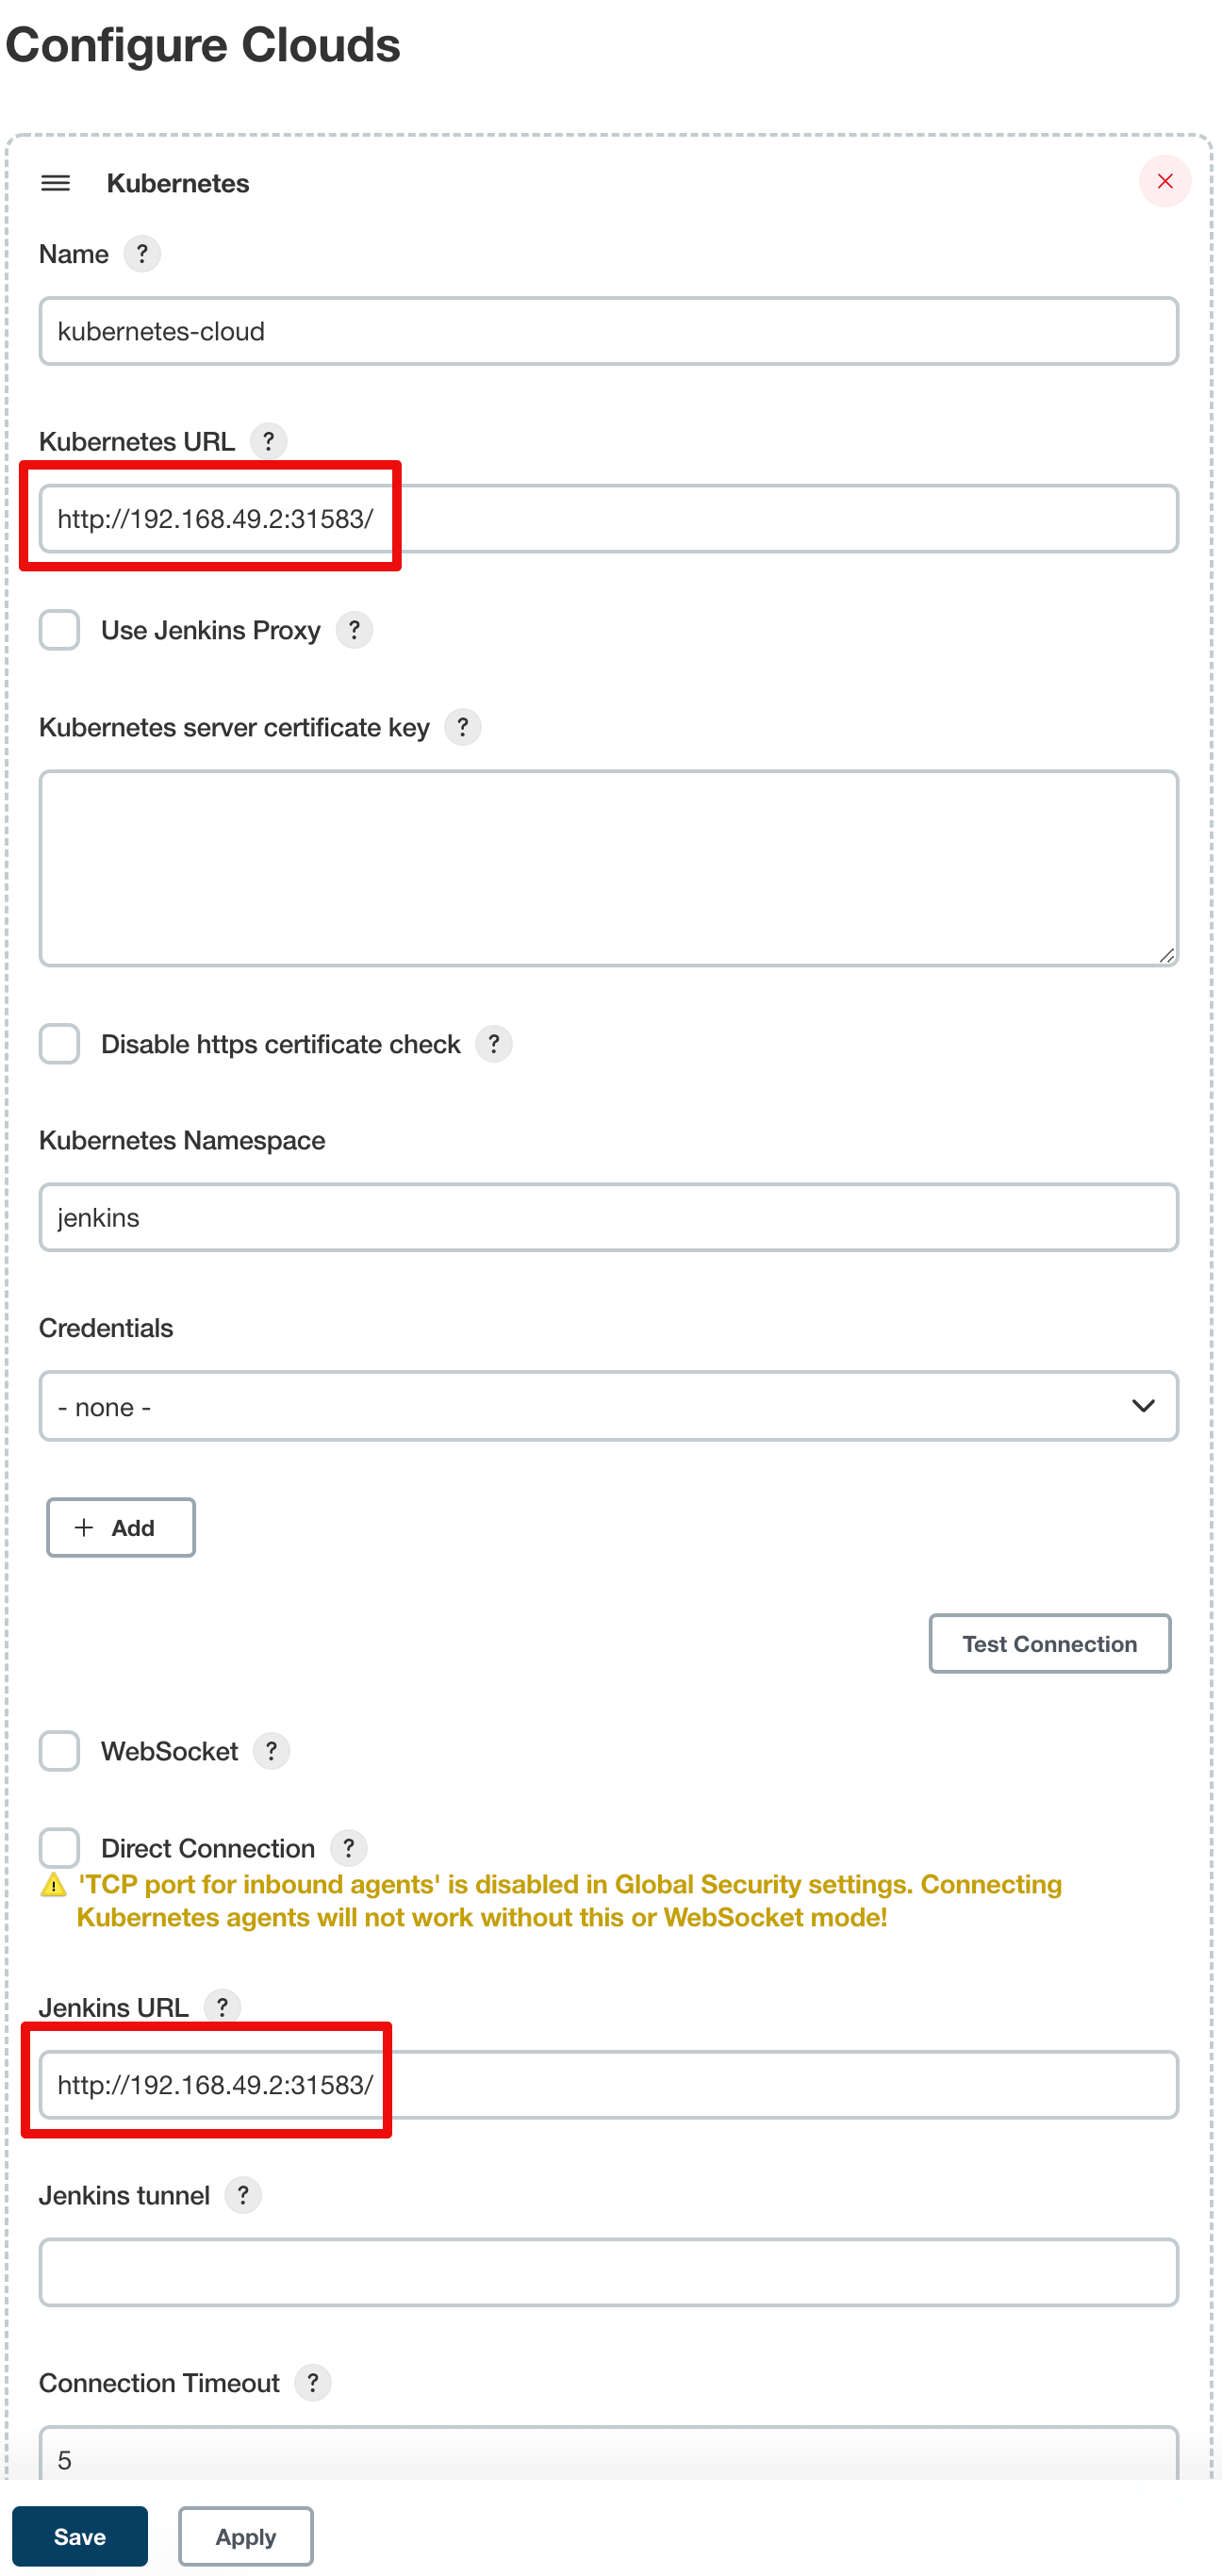
In order to configure the Jenkins agents. We need to know the URL of the Kubernetes controller and the internal cluster URL of the Jenkins pod. You can get the Kubernetes controller URL by this specified command:
kubectl cluster-info
Kubernetes control plane is running at https://192.168.49.2:8443
KubeDNS is running at https://192.168.49.2:8443/api/v1/namespaces/kube-system/services/kube-dns:dns/proxy

To further debug and diagnose cluster problems, use 'kubectl cluster-info dump'.
The Jenkins pod URL port is standard - 8080, and you can get IP address
following the steps below.
First, we need to get the Jenkins pod id, which is the value of the output provided by this command:
kubectl get pods -n jenkins | grep jenkins
<pod_id>   1/1       Running   0          9m
Second, we need to run the command that describes the pods passing the pod id as an argument. You will find the IP address in the output:
kubectl describe pod -n jenkins jenkins-5fdbf5d7c5-dj2rq
…..
IP:             172.17.0.4
Kubernetes Plugin Configuration
Now, we are ready to fill in the Kubernetes plugin configuration. In order to do that, open the Jenkins UI and navigate to “Manage Jenkins → Nodes and Clouds → Clouds → Add a new cloud → Kubernetes and fill in the Kubernetes URL and Jenkins URL appropriately, by using the values which we have just collected in the previous step.

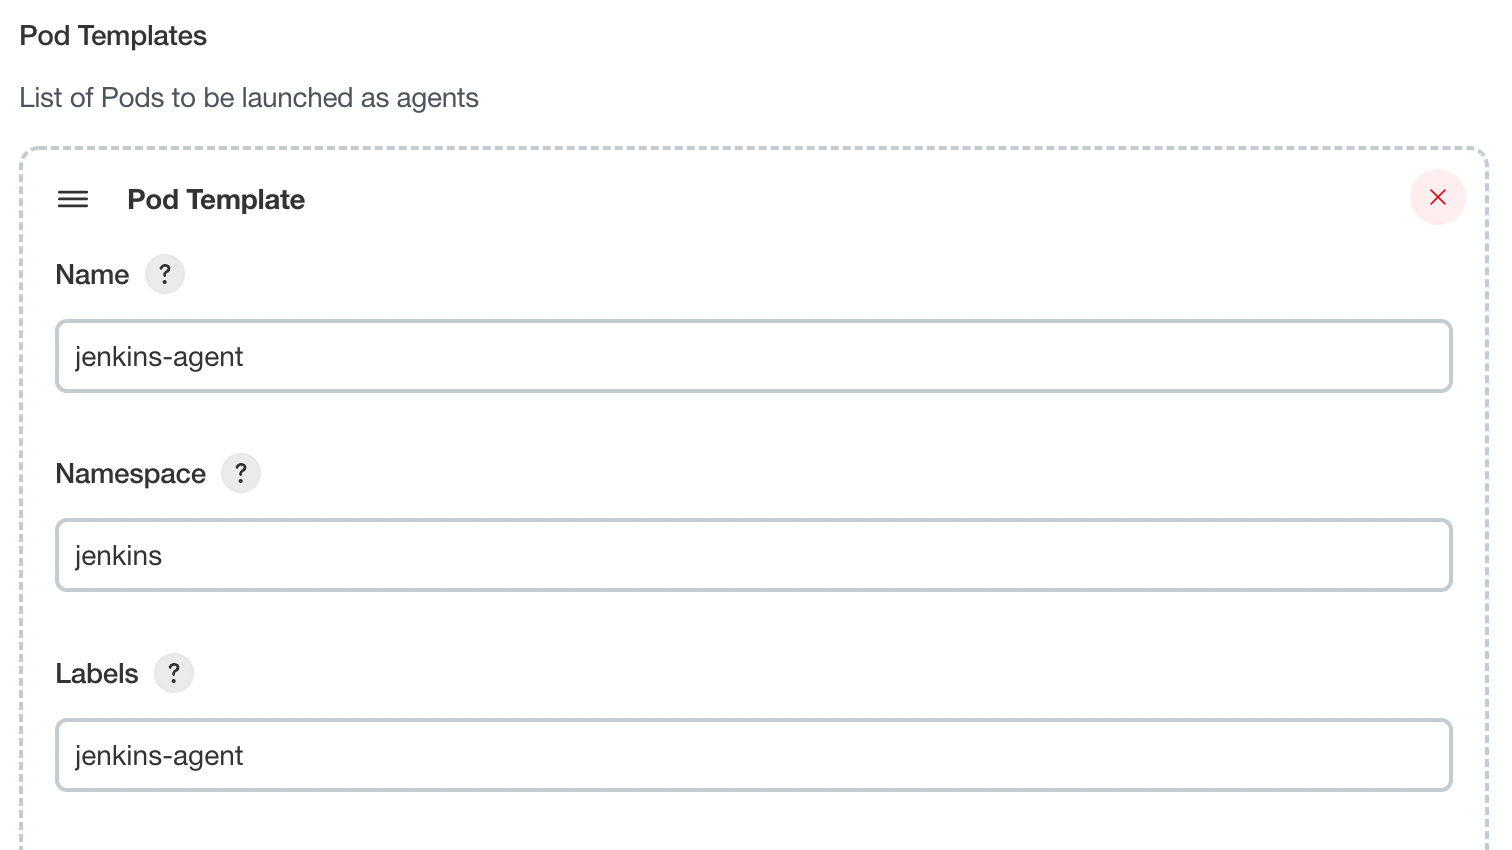
In addition to that, in the Kubernetes Pod Template section, we need to configure the image that will be used to spin up the agents.
If you have some custom requirements for your agents, you can build one more dockerfile with the appropriate changes the same way we did for the Jenkins controller.
On the other hand, if you don’t have unique requirements for your agents, you can use the default Jenkins agents image available on the official Docker hub repository. In the ‘Kubernetes Pod Template’ section you need to specify the following (the rest of the configuration is up to you):
Kubernetes Pod Template Name - can be any and will be shown as a prefix for unique generated agents' names, which will be run automatically during builds Docker image - the docker image name that will be used as a reference to spin up a new Jenkins agents.

Using Jenkins Agents
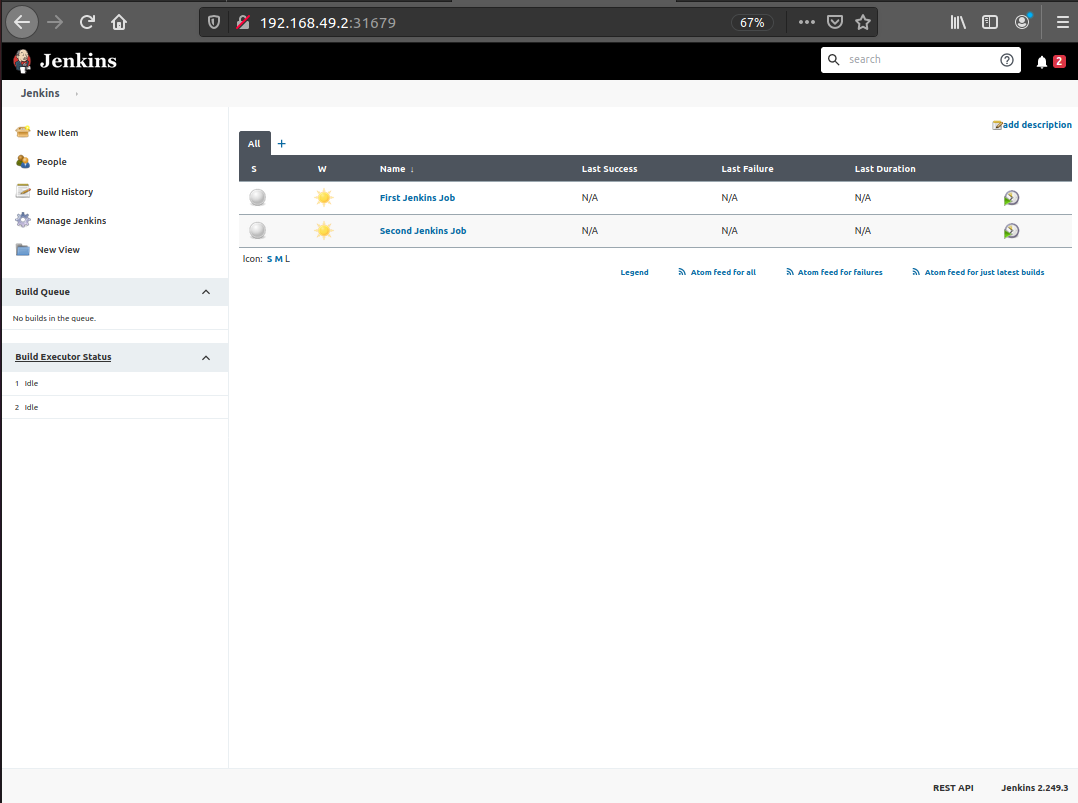
Now all the configuration seems to be in place and we are ready for some tests. Let’s create two different build plans.

Now let’s trigger the execution for both of the builds.
You should see that both build plans appear in the Build Queue box almost immediately.
If you applied the correct configuration in the previous steps, you should see that you have two additional executors and both have the prefix jenkins-agent, in about 10-15 seconds.
This means that these nodes were automatically launched inside the Kubernetes cluster by using the Jenkins Kubernetes plugin, and, most importantly, that they were run in parallel.
You can also confirm this from the Kubernetes dashboard, which will show you a couple of
new pods.
After both builds are completed, you should see that both build executors have been removed and are not available inside the cluster anymore.
Congratulations! We’ve successfully set up scalable Jenkins on top of a Kubernetes cluster.
Please submit your feedback about this page through this quick form.
Alternatively, if you don't wish to complete the quick form, you can simply indicate if you found this page helpful?
See existing feedback here.